

Cloudflare Pages
Cloudflare Pages is Cloudflare’s platform for hosting static sites connected to a Git repository: every commit on the production branch triggers a build and a deployment.
In this guide we are going to deploy a static site that reads Content Island content at build time, and automate the rebuild with Content Island’s Custom HTTP Webhook: when you publish content, Content Island calls Cloudflare’s deploy hook and the site regenerates on its own.
What we are setting up
The full flow has four pieces:
- You publish content in Content Island.
- Content Island calls the Custom HTTP Webhook we are about to configure.
- That URL is a Cloudflare Pages Deploy Hook, which triggers a new build.
- The build reads the content again and deploys the new version.
Before you begin
- Your project in a Git repository (GitHub or GitLab), with a build command that generates the static site and reads the content through one of Content Island’s static snapshot approaches: exporting the snapshot with
content-island exportas a step before the build, or reading it fromsnapshotPathif you commit it to the repository. - A Cloudflare account.
- The access token of your Content Island project, which the build needs in order to export or read the content.
Step 1 · Create the project in Cloudflare Pages
-
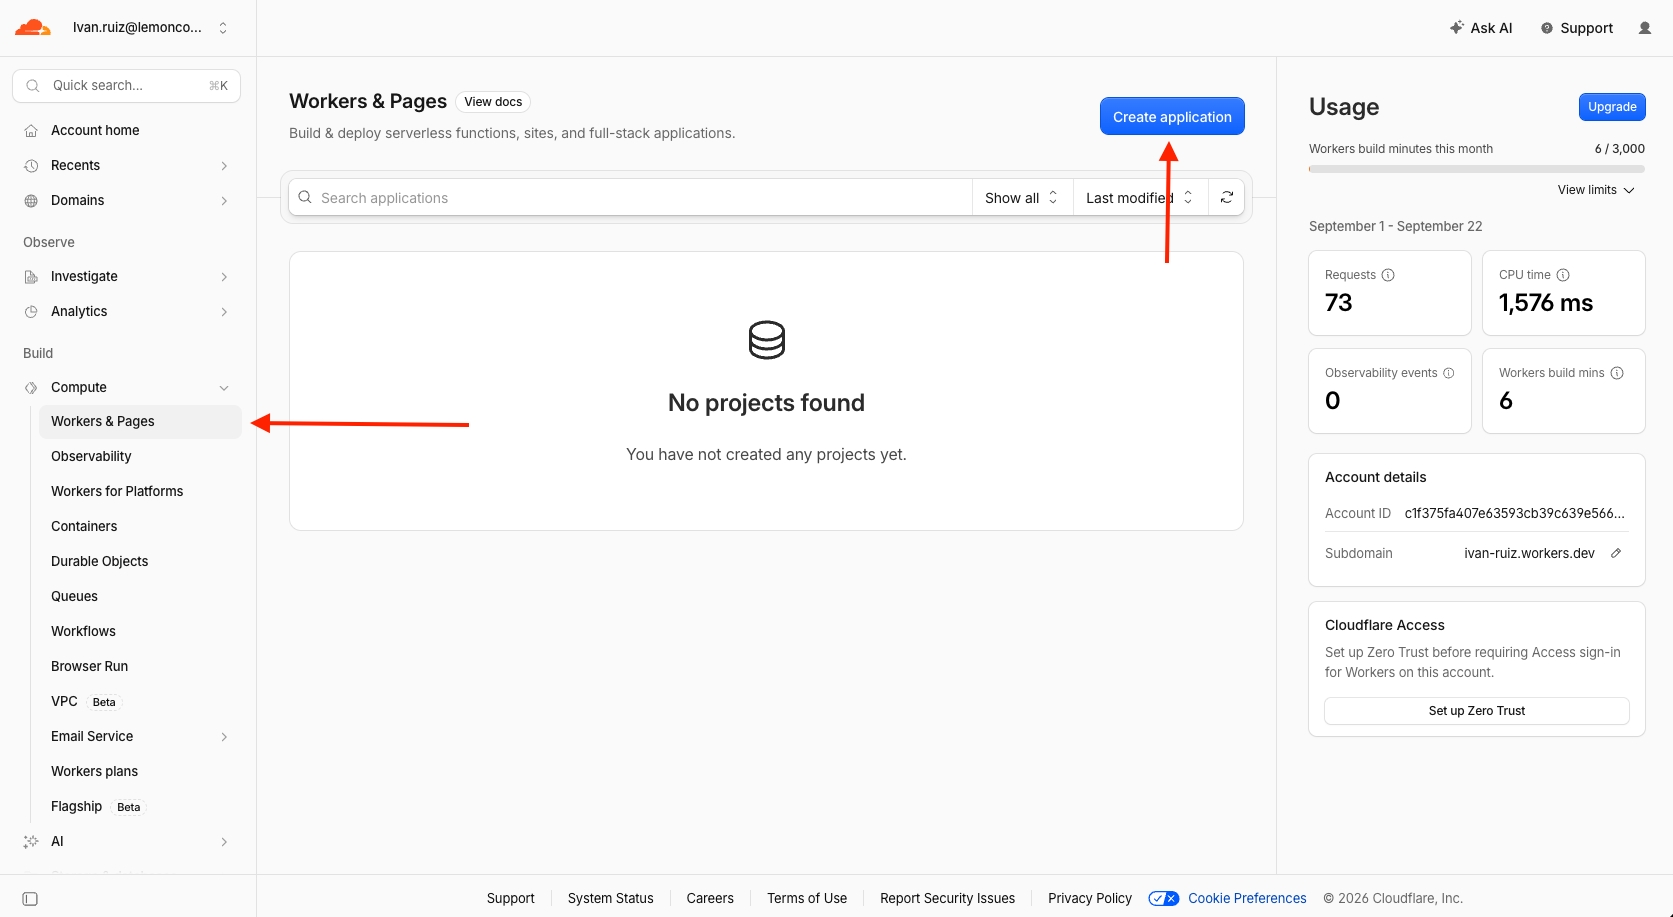
In the Cloudflare dashboard, go to Compute → Workers & Pages and click Create application.
-
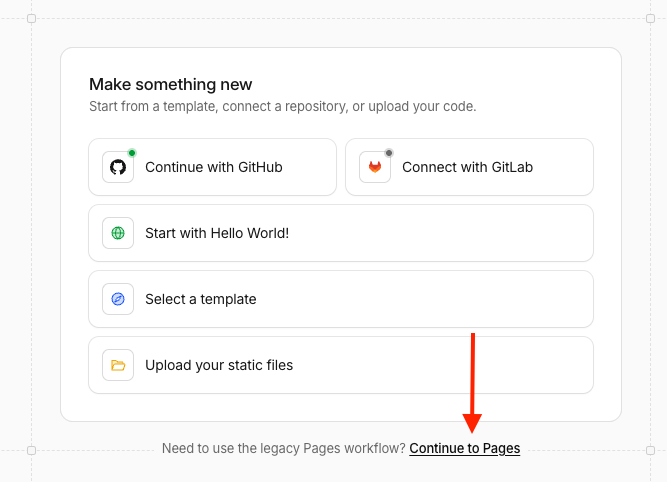
On the Make something new screen, scroll to the bottom and click Continue to Pages. This is the classic Pages workflow, the one that comes with the deploy hooks we are going to use later.
-
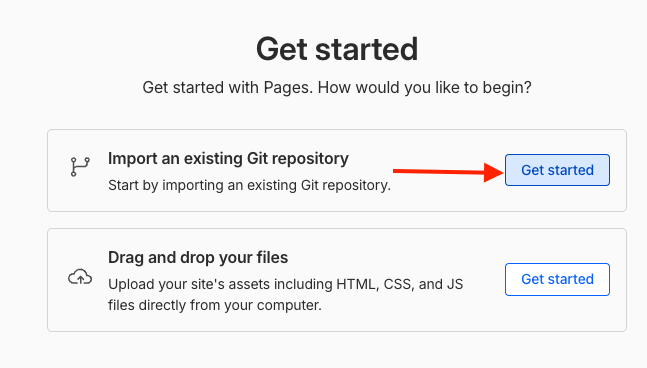
On Get started, choose Import an existing Git repository.
-
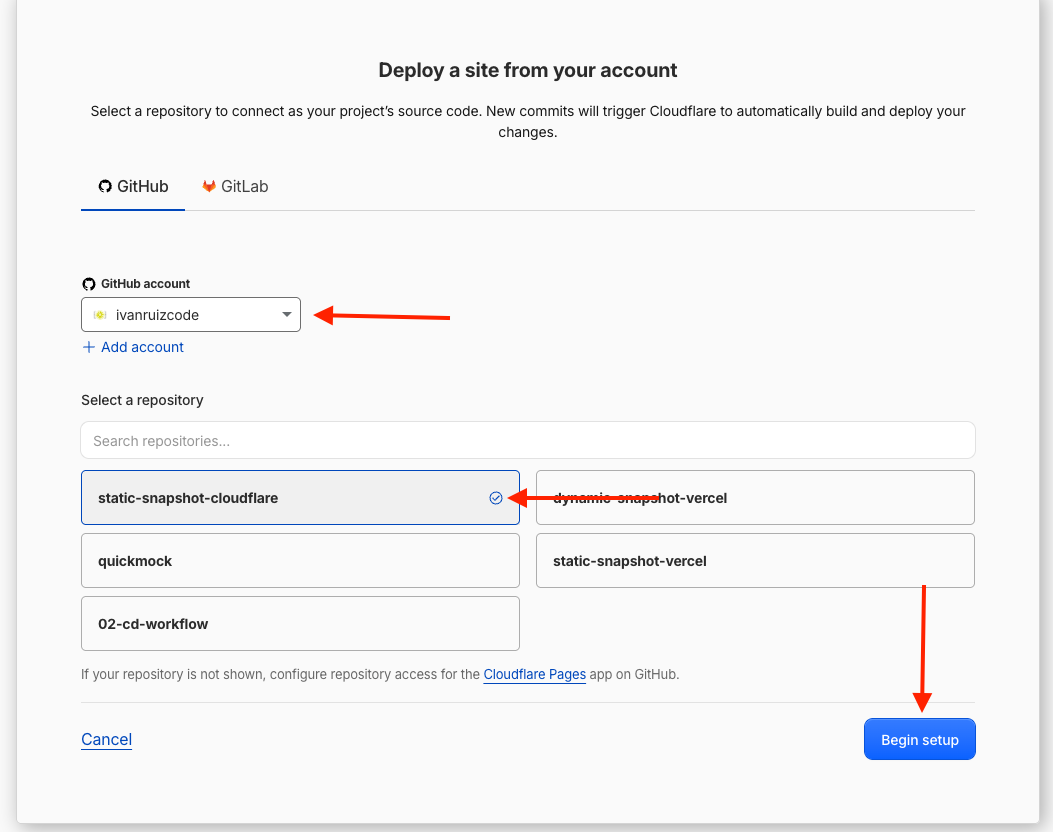
Select your GitHub account, pick the project repository and click Begin setup. If your repository is not listed, use the Cloudflare Pages app on GitHub link to grant access to it.
Step 2 · Configure the build
-
Cloudflare shows you the Build settings section, empty. Leave Framework preset as
Noneif you would rather set the commands yourself, or pick your framework so it fills them in for you.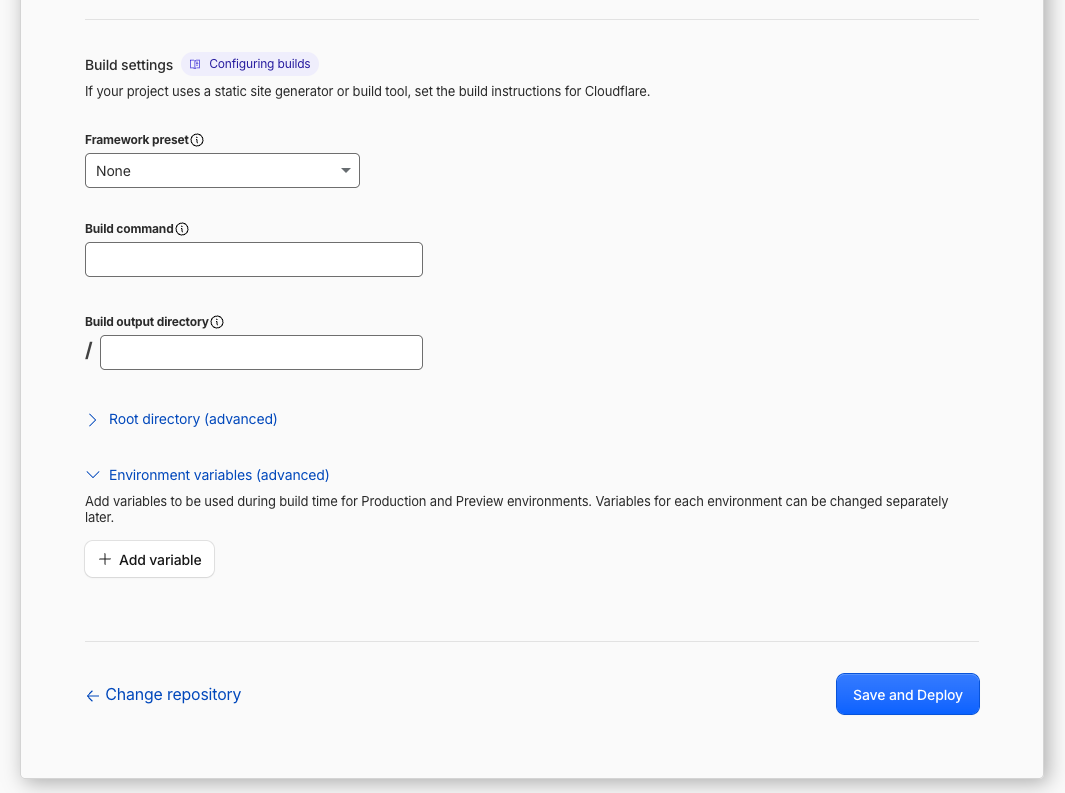
-
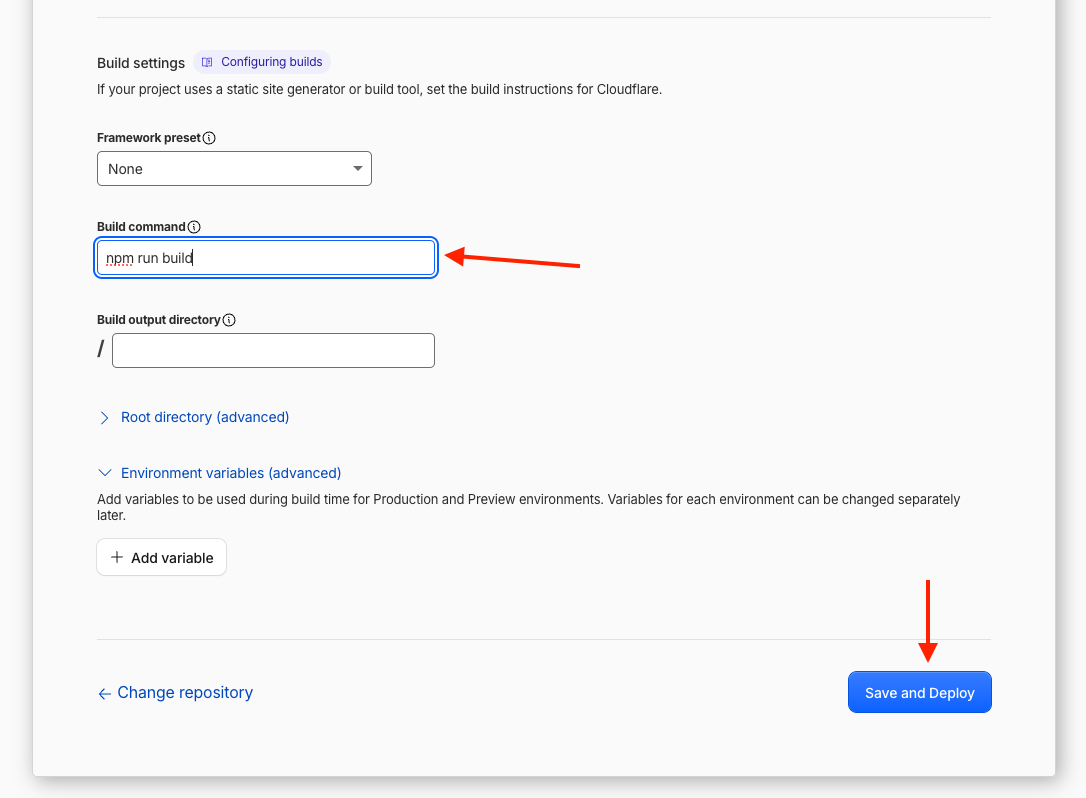
Fill in your project’s build command and output directory:
- Build command:
npm run build - Build output directory:
dist
- Build command:
-
Expand Environment variables (advanced) and add the variables your build needs. At a minimum, the access token the client uses to read Content Island content.
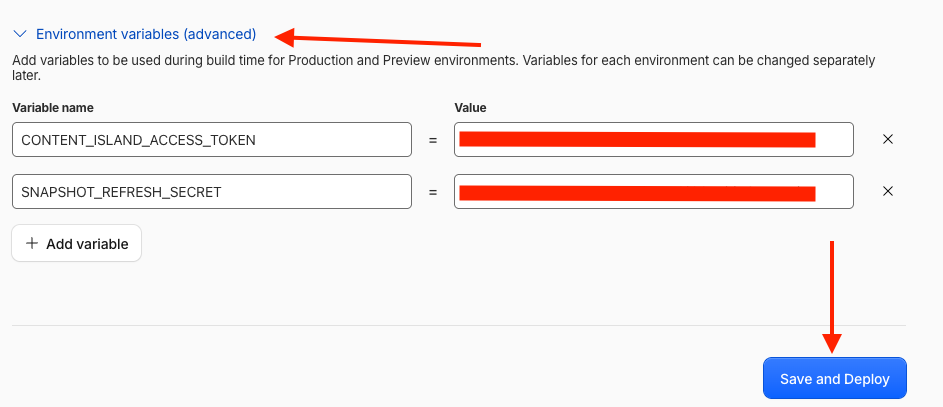
There are two in the screenshot:
CONTENT_ISLAND_ACCESS_TOKEN, which every project needs, andSNAPSHOT_REFRESH_SECRET, which belongs to the example project. Use whatever names your code expects. -
Click Save and Deploy. Cloudflare clones the repository, runs the build and publishes the site on a
*.pages.devURL.
Step 3 · Create the Deploy Hook in Cloudflare
A deploy hook is a secret URL that, on receiving a POST, triggers a new build of a specific branch. It is the piece we are going to hand over to Content Island.
-
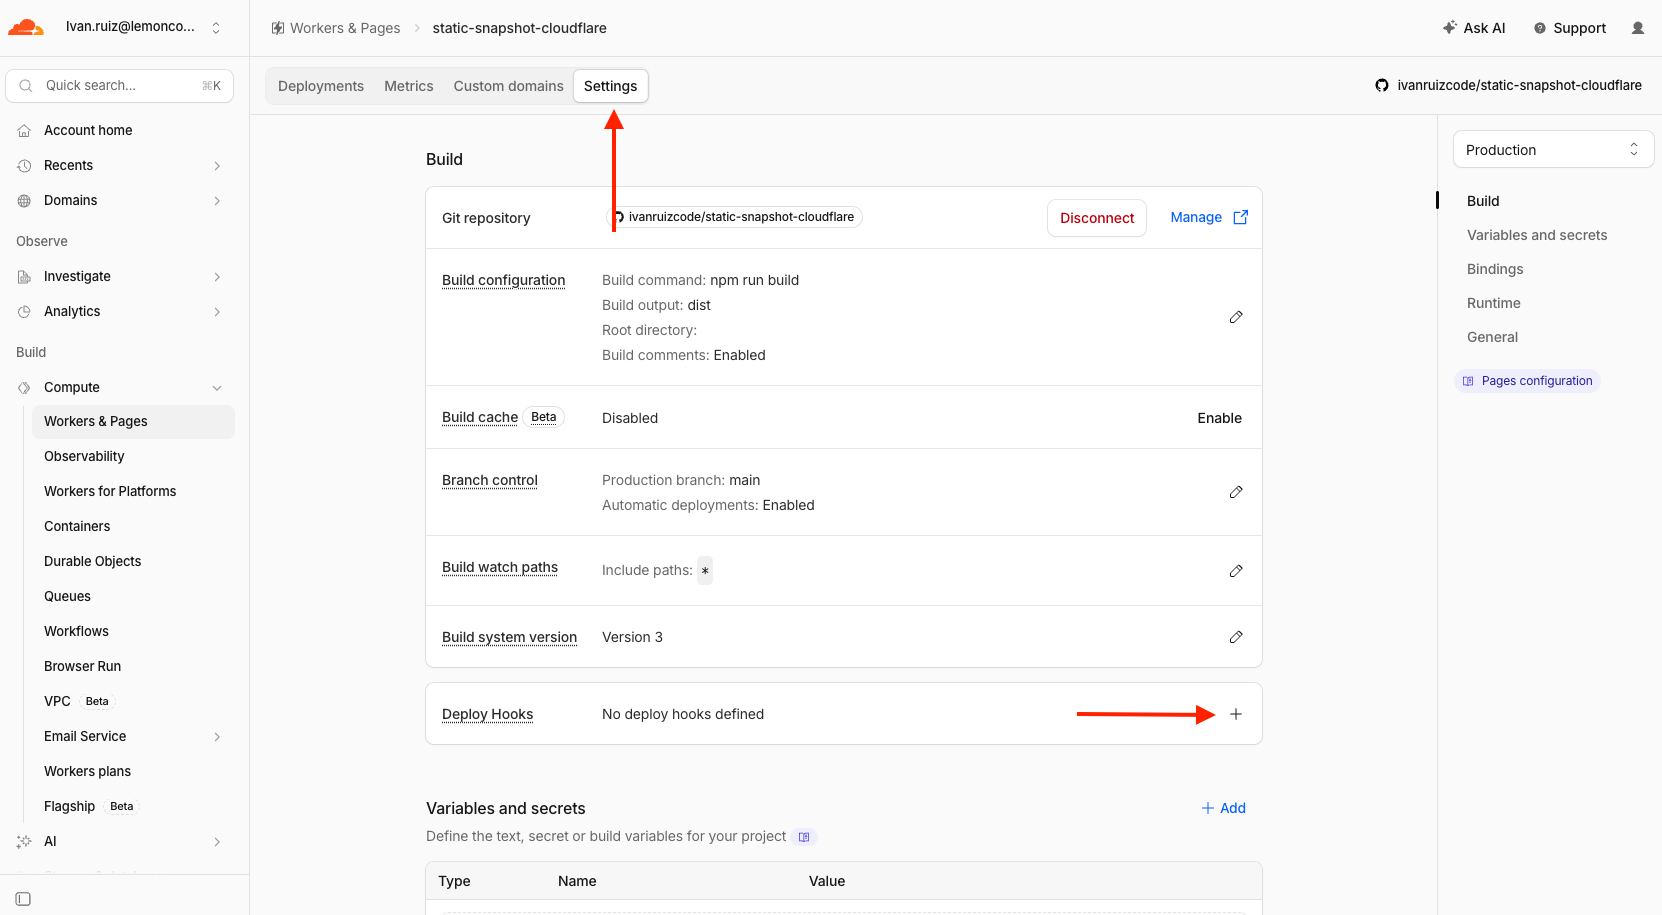
In your Pages project, open the Settings tab, find the Build block and, under Deploy Hooks, click the + button.
-
Give it a name that tells you where the call comes from —
content-island-webhook, for example — and pick the branch you want to build, usuallymain. Click Save.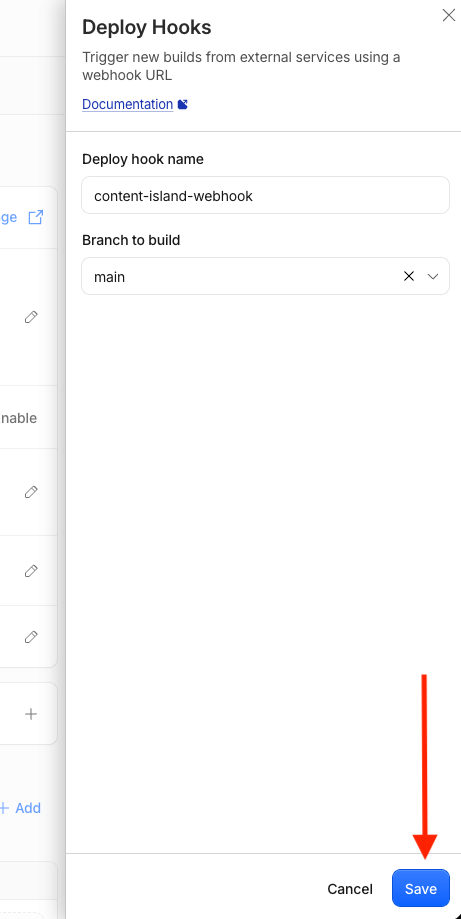
-
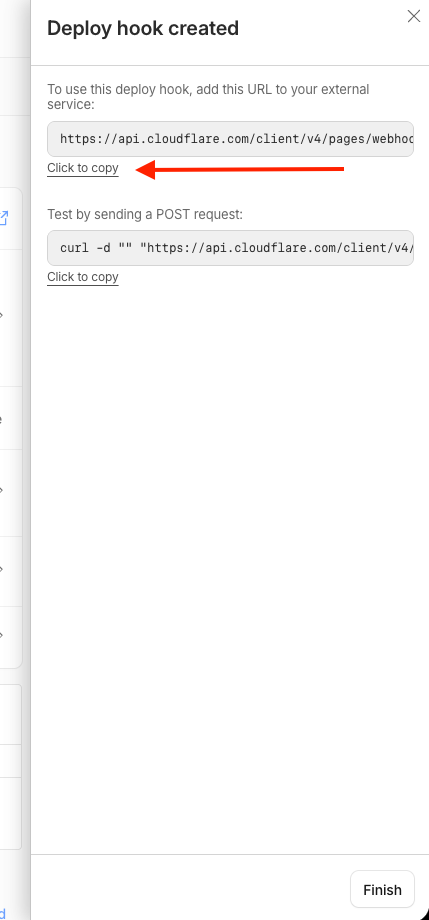
Cloudflare shows you the hook URL. Copy it with Click to copy: you are going to paste it into Content Island in the next step.
Step 4 · Connect the Custom HTTP Webhook in Content Island
-
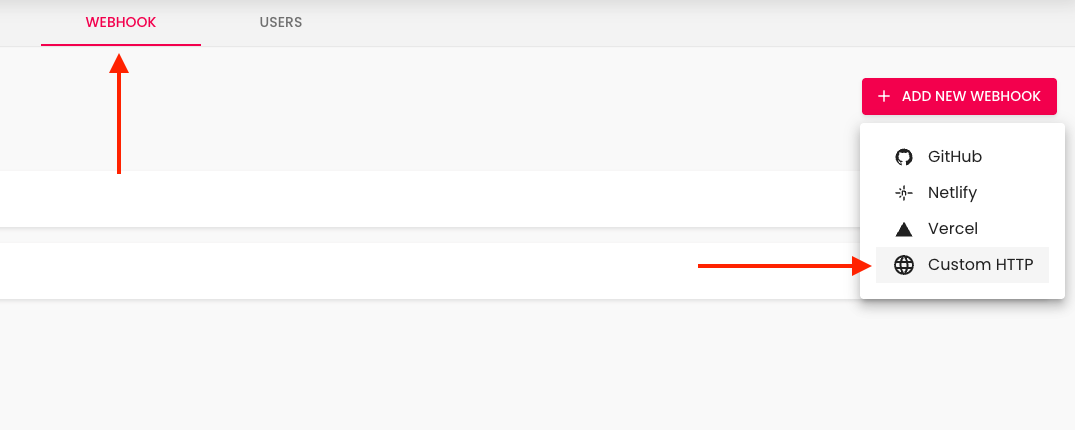
Open your project in Content Island, go to the Webhook tab, click Add New Webhook and choose Custom HTTP.
-
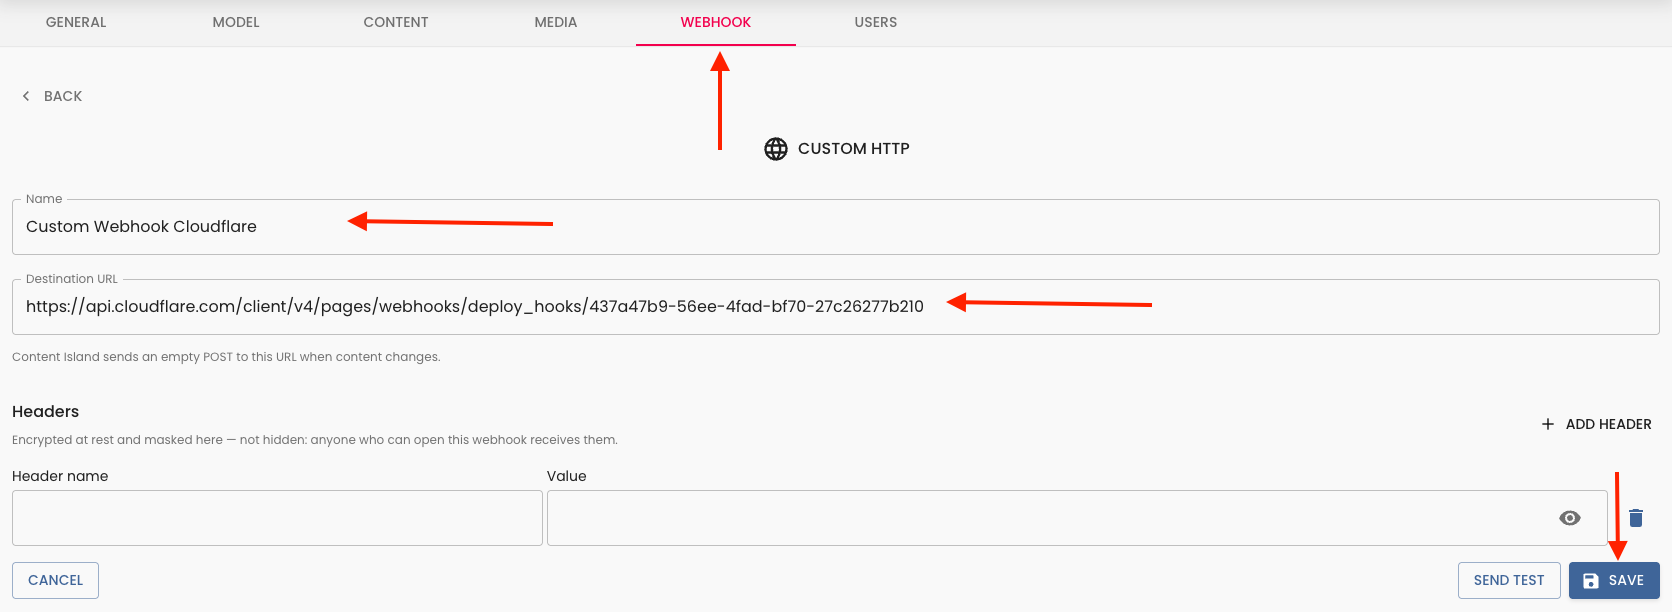
Fill in the form:
- Name: an alias to recognize it by, for example
Custom Webhook Cloudflare. - Destination URL: the deploy hook URL you copied in the previous step.
- Headers: leave them empty. The Cloudflare deploy hook authenticates with the URL itself, and Content Island sends a
POSTwith no body — exactly what it expects.
Click Save.
- Name: an alias to recognize it by, for example
Step 5 · Check that it works
-
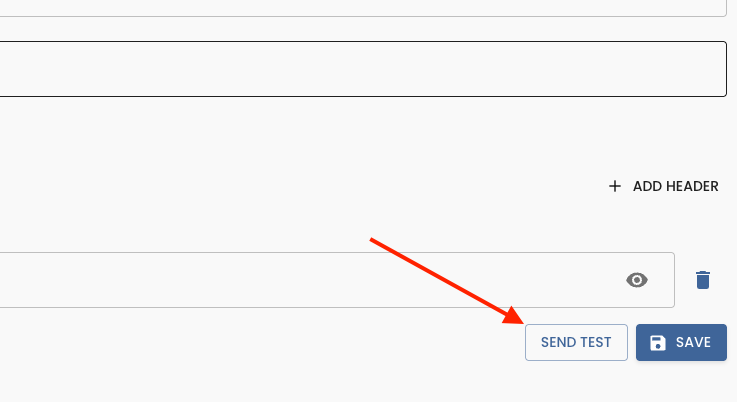
Without leaving the webhook, click Send Test. Content Island fires the request there and then, so you can check the result without publishing anything.
-
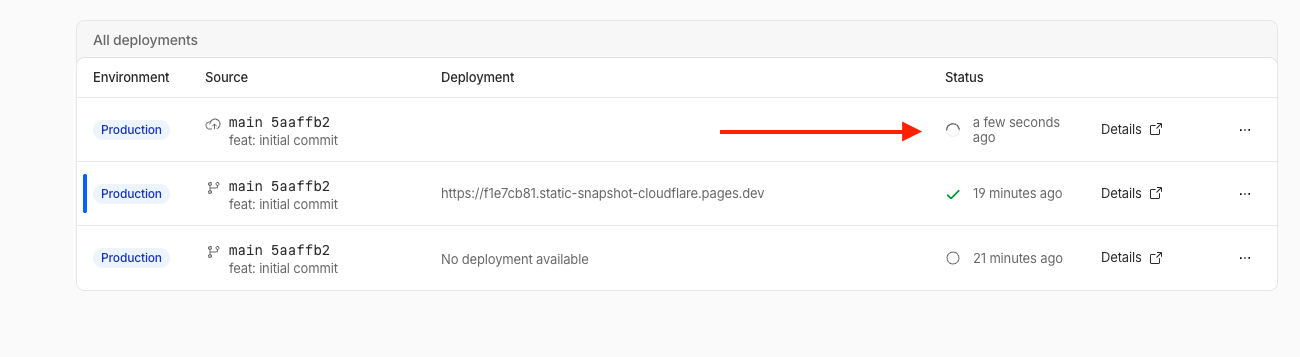
Go back to your Cloudflare Pages project, to the Deployments tab: you will see a new deployment, just started and marked with the cloud icon that says a deploy hook triggered it rather than a commit.
-
The definitive test is the real one: change anything in the Content tab and publish it. Content Island calls the hook, Cloudflare rebuilds the site and, once the build finishes, your site shows the new content without you touching a thing.
Why the Custom HTTP Webhook and not the GitHub one
You can achieve the same thing with the GitHub webhook, but you take the long way round: Content Island fires a repository_dispatch, a GitHub Action listens for that event, and that Action curls the deploy hook. Three hops, a GitHub token with write permissions and a workflow to maintain, all to end up making a single HTTP request.
The Custom HTTP Webhook calls the Cloudflare URL directly. No middlemen and no tokens involved.