Content Tab
Once the models are defined (Model tab), you can create instances of those entities in the Content tab.
Creation
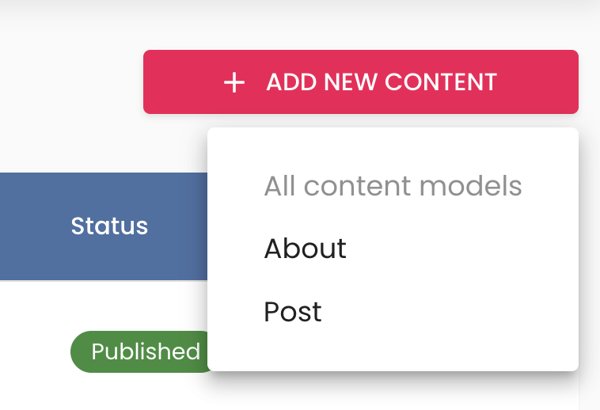
The first time you navigate to the Content tab, the content list will be empty. You can add content by clicking the ”+ Add new content” button. Upon clicking it, a list of created models appears, and you can select one (e.g., you want to create a Post).
This action takes you to edit mode.
Editing
There are two ways to enter edit mode:
- By adding new content.
- By clicking the edit icon (pencil) on a row in the content list.
When entering edit mode, a set of fields will be shown depending on the model structure defined.
What types of fields can you expect?
- Short Text: a simple text field.
- Long Text: a markdown-supported text area.
- Number: a numeric input.
- Date: a date picker.
- Date and Time: a datetime picker.
- Media: a media upload field (image, video, etc.).
- Boolean: a switch between true/false.
- Color: a color picker that uses the hexadecimal format (e.g.,
#FFFFFFfor white). - Another Entity: a field that references another entity (for example, if we have a Blog entity and an Author entity, we can create an author field that references an Author object).
- Collection: a field to add multiple items (e.g., several images).
In this tab, saving is automatic. Every change is saved instantly.
If validations are configured on the fields, they are triggered on blur. If the value is invalid, an error message is displayed.
Publishing
As you edit a document, changes are saved in draft mode.
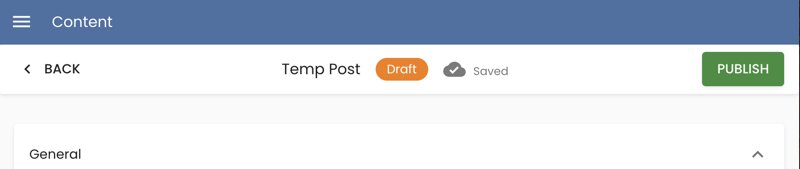
That means external applications consuming the content will not see changes until the content is published.
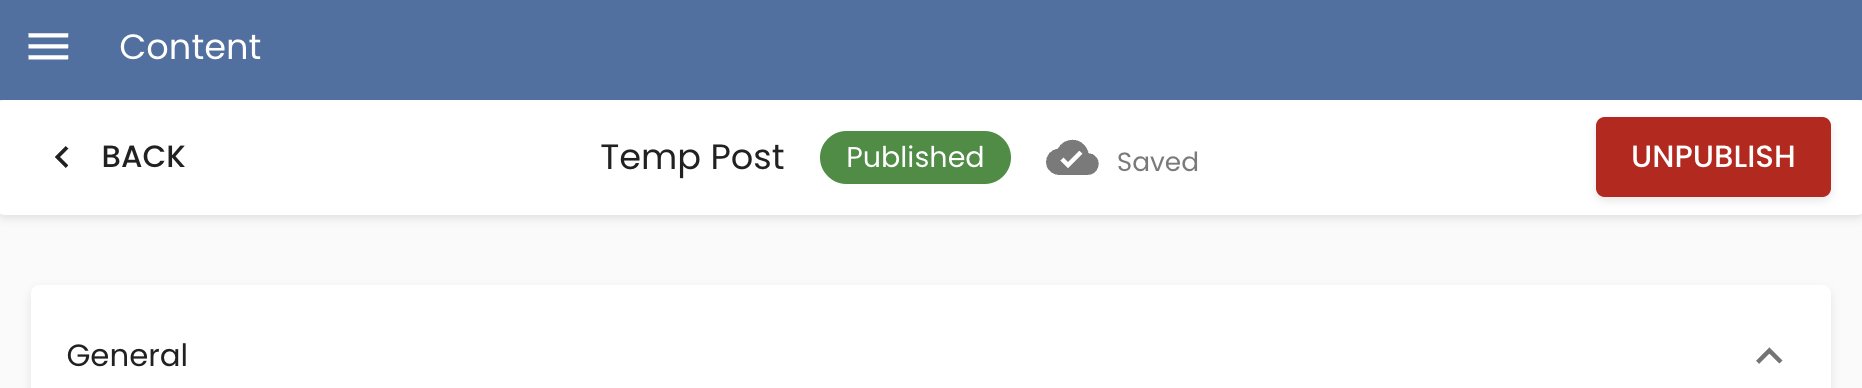
Once you’re confident the changes are ready, click the publish button and the status will change to published.
Multilanguage
If you’ve enabled multilingual support for your project, when editing a content entry, you’ll see a tab for each available language:
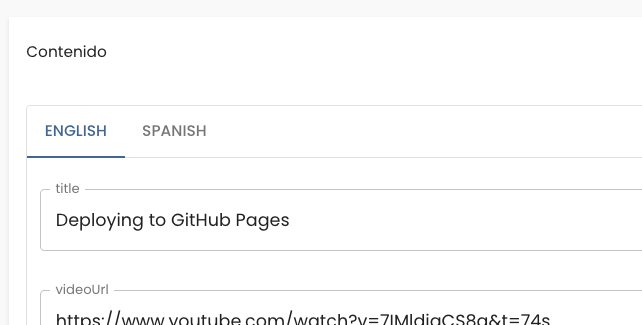
Important: When working with multiple languages, each language’s content is completely independent. You need to provide the full content (images, text, etc.) for each language individually.
Smart Copy
When managing content in multiple languages, Smart Copy makes the process more efficient by automatically copying and translating content across different languages in a Headless CMS. In the content tab if we support more than one language, you will see a button on the right that says “Smart Copy”.

If we click on that button, we get a dialog where we can choose the source language we want to copy from and if we want to translate it automatically:
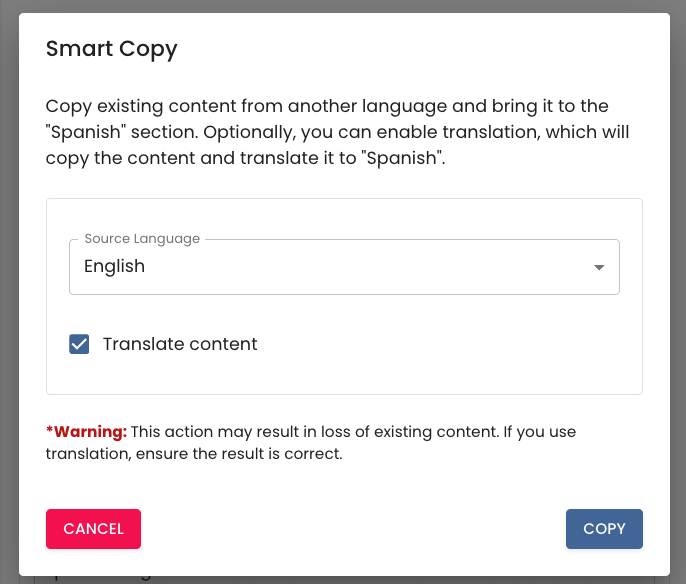
When pressing start a process and when it is completed it will have copied and translated (if we have selected that option) the content to the target language tag that we had active.
The currently supported languages are:
- Arabic (AR)
- Bulgarian (BG)
- Czech (CS)
- Danish (DA)
- German (DE)
- Greek (EL)
- British English (EN-GB)
- American English (EN-US)
- Spanish (ES)
- Latin American Spanish (ES-419)
- Estonian (ET)
- Finnish (FI)
- French (FR)
- Hebrew (HE)
- Hungarian (HU)
- Indonesian (ID)
- Italian (IT)
- Japanese (JA)
- Korean (KO)
- Lithuanian (LT)
- Latvian (LV)
- Norwegian (bokmål) (NB)
- Dutch (NL)
- Polish (PL)
- European Portuguese (PT-PT)
- Brazilian Portuguese (PT-BR)
- Romanian (RO)
- Russian (RU)
- Slovak (SK)
- Slovenian (SL)
- Swedish (SV)
- Thai (TH)
- Turkish (TR)
- Ukrainian (UK)
- Vietnamese (VI)
- Chinese Simplified (ZH-HANS)
- Traditional Chinese (ZH-HANT)
Deleting
You can also delete a post by clicking the trash icon on the right side of each row.
Example
Example of how this works: Watch content creation tutorial video