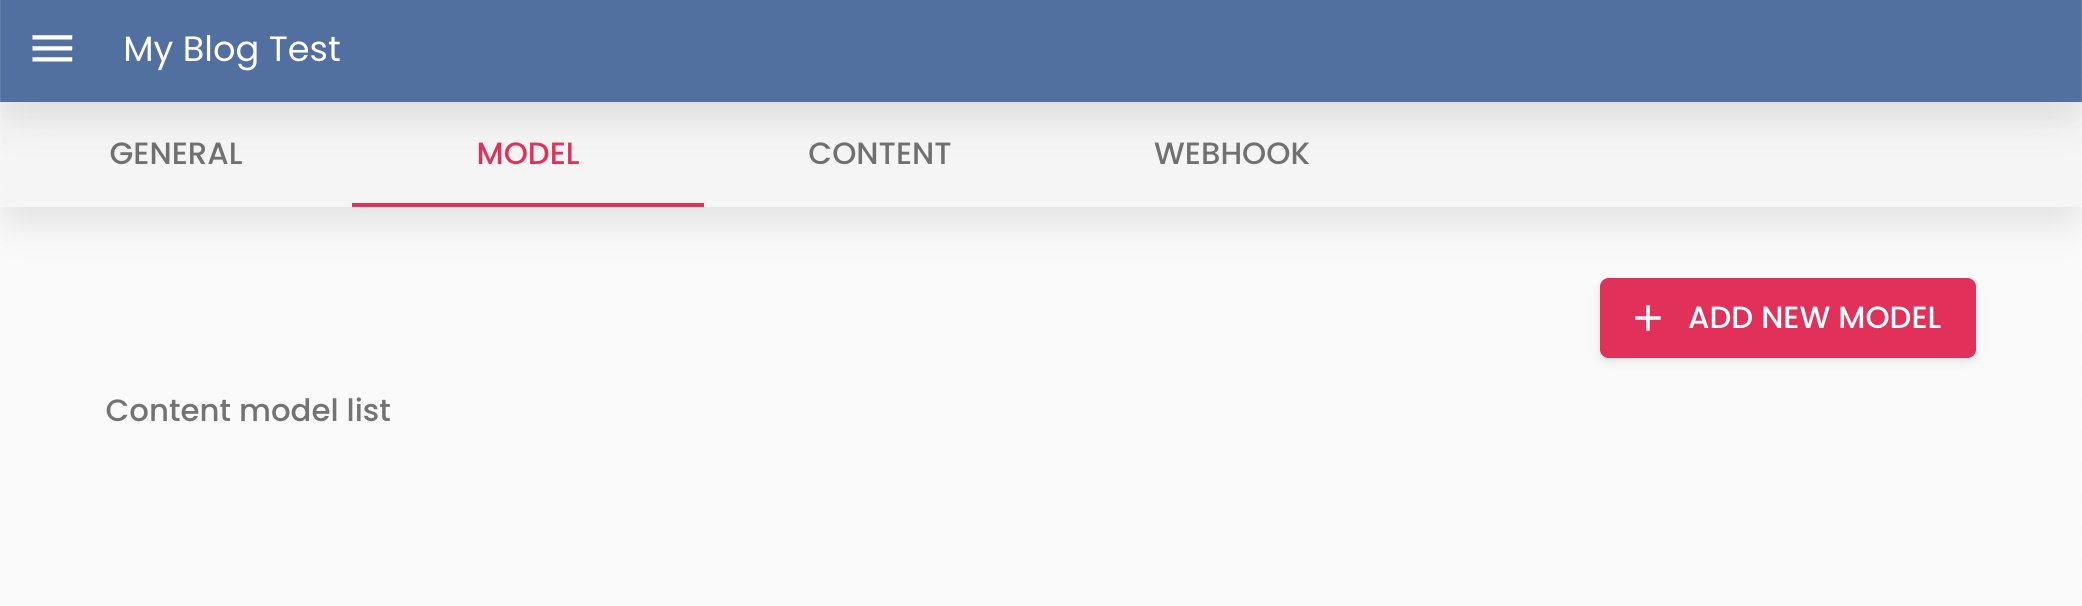
Model Tab
The Model tab allows us to define the data structures that we will later use to create content.
Creation
When you enter the tab for the first time, it is empty and you can choose between:
- Create a new model by clicking the Add New Model button
- Create a new enum by clicking the Add New Enum button
Model
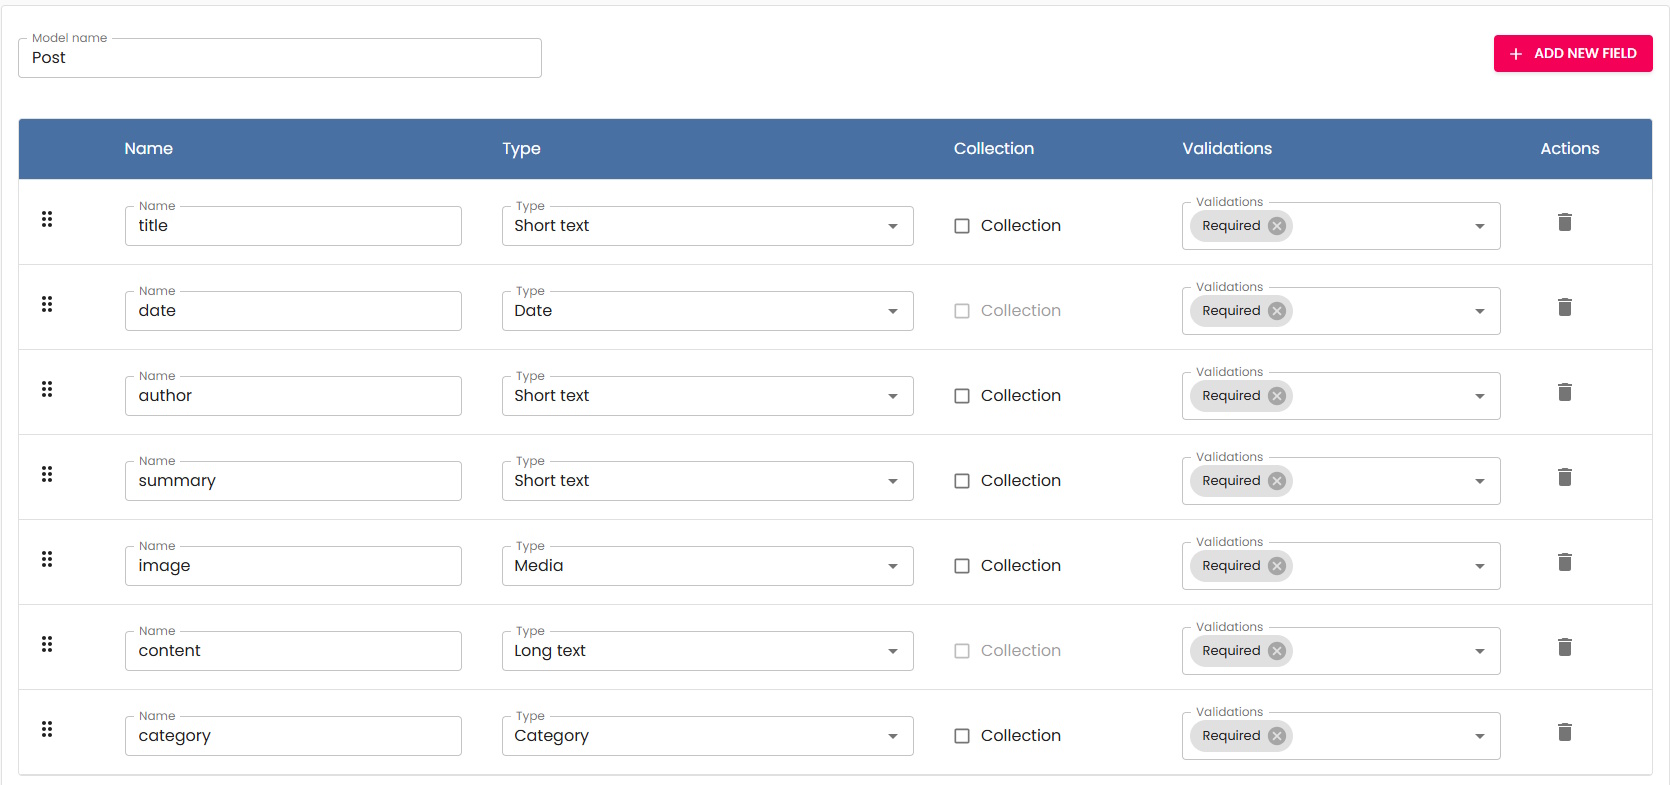
A model is an entity with a set of fields. For example, you can have a model called Post with fields like title, publish date, author, content, etc.
When creating a new model:
You must give it a name. For example, let’s create the entity Post.
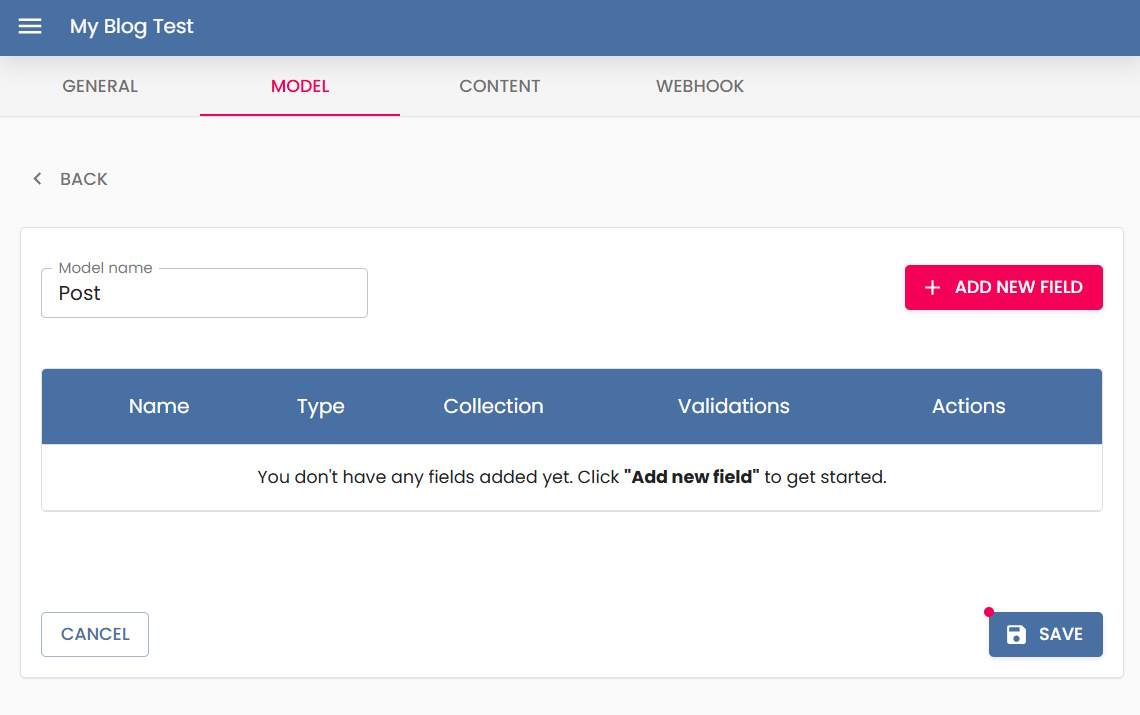
Inside the post model, we start defining fields.
For each field, you provide:
-
The name of the field, e.g., title.
-
The field type, currently Content Island supports:
- Short Text: a simple text string.
- Long Text: a text string that supports markdown.
- Number: a numeric value.
- Date: a date.
- Date and Time: a date including time.
- Media: a file type like image or video.
- Boolean: accepts two values true/false
- Color: a text string that uses the hexadecimal format (e.g.,
#FFFFFFfor white). - Another Entity: a field that references another entity. For example, if we have a a Course entity and a Lesson entity, we can create a Lessons field in Course that refers to a list of Lesson entities.
- Enum: a field that references an enum you created previously. Similar to Another Entity, but in this case the value must be one of the predefined enum values.
-
If it is a collection, e.g., to have an image carousel, define a field named photo, type media, and check collection as true, allowing multiple items.
-
Validations: each field may include validations supported by Content Island:
- Required: the field must be filled.
- Unique: the field must be unique, e.g., an email field cannot be duplicated.
- Media Type: allowed media formats (jpg, png, gif, etc.).
- Minimum Length: for string fields (pencil icon lets you set the number).
- Maximum Length: for string fields (pencil icon lets you set the number).
Each time you add a new field, a row is added to the table, and you can continue adding more.
A final result may look like this:
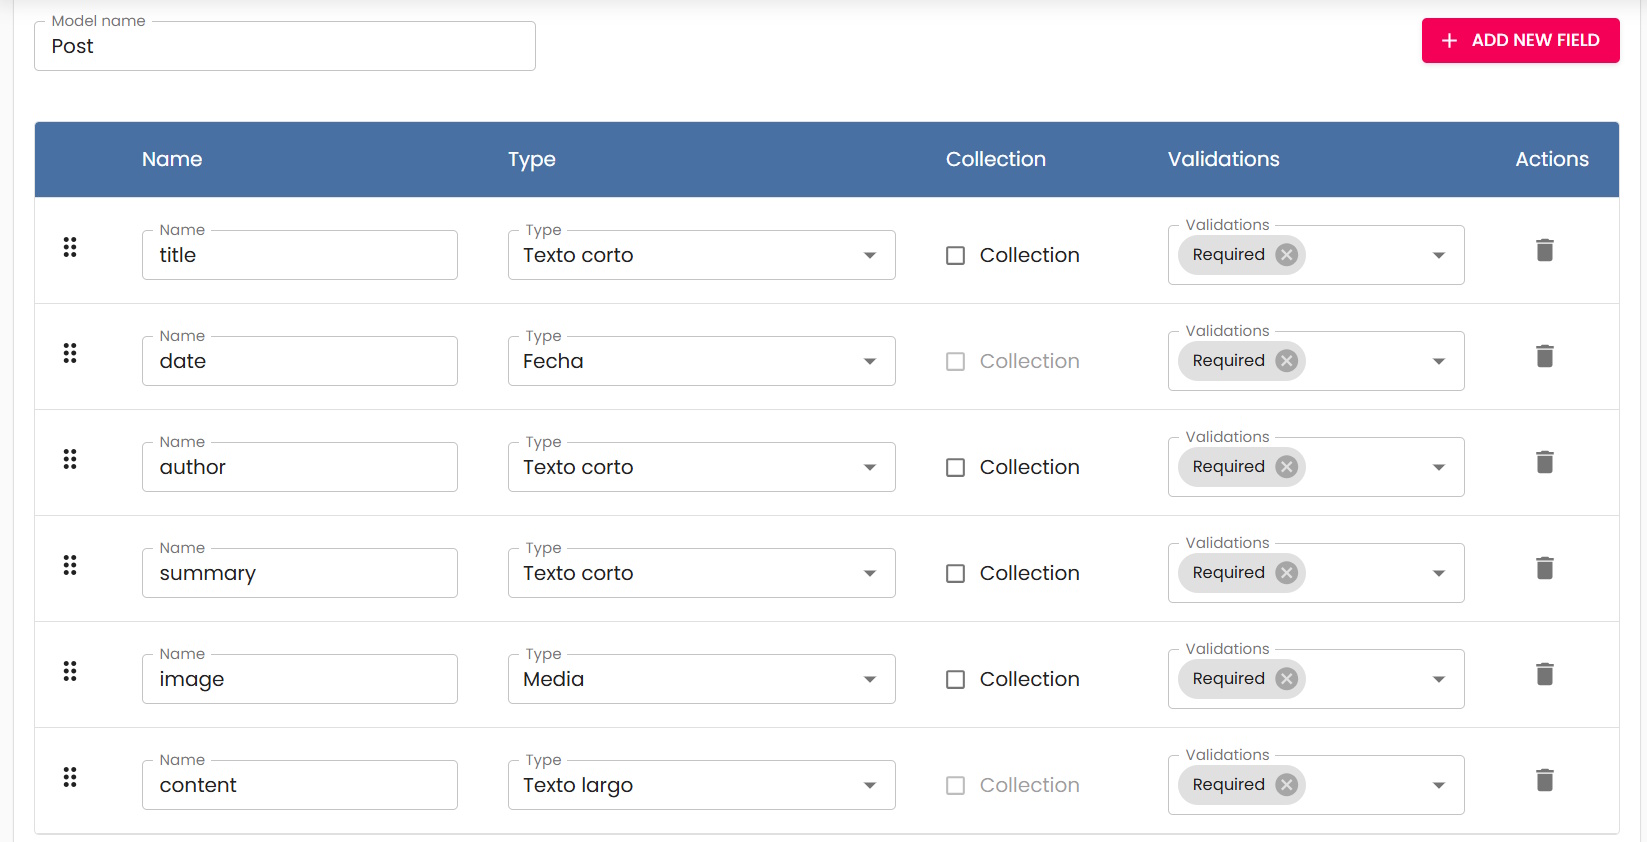
You can delete or reorder rows by dragging (use the icon on the left of each row).
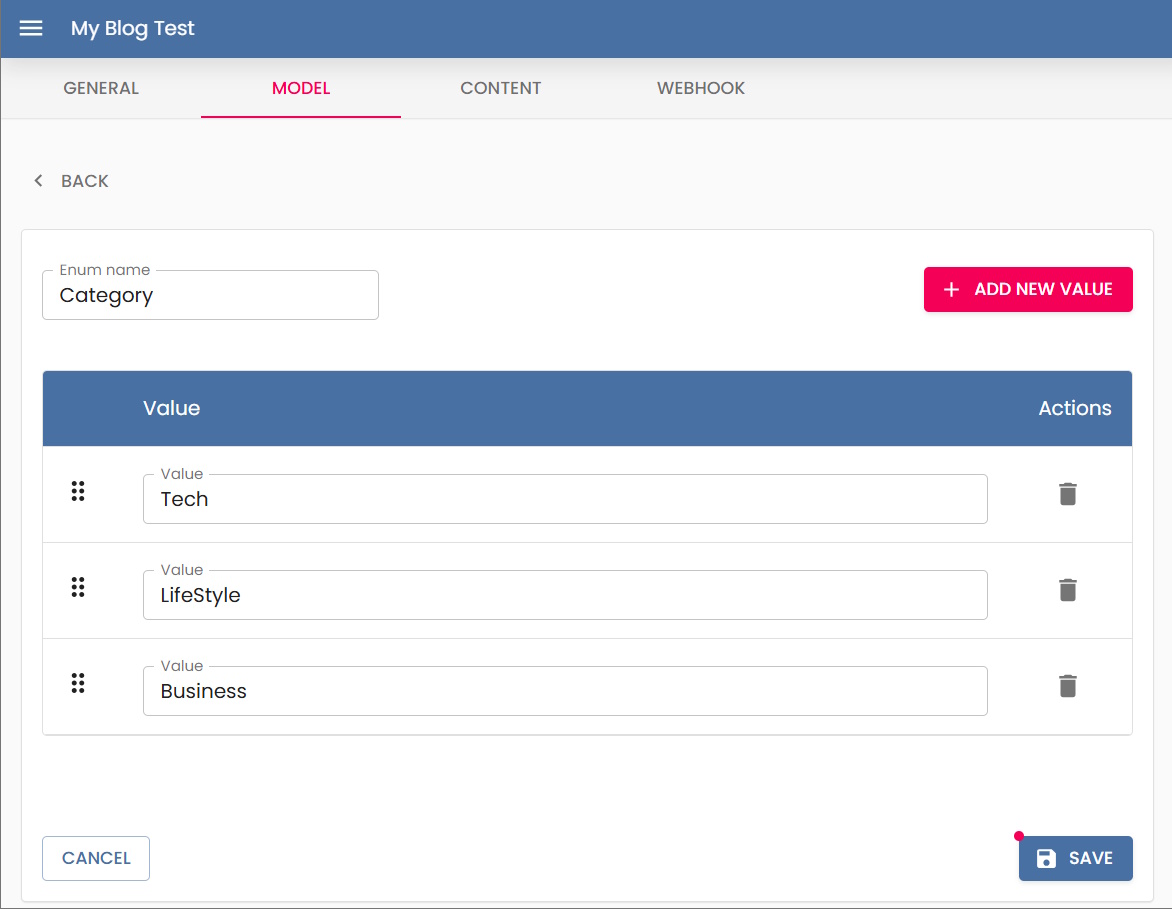
Enum
An enum is a list of predefined values that you can reuse in models.
When you create a new enum:
You must give it a name. For example, let’s create the enum Category.
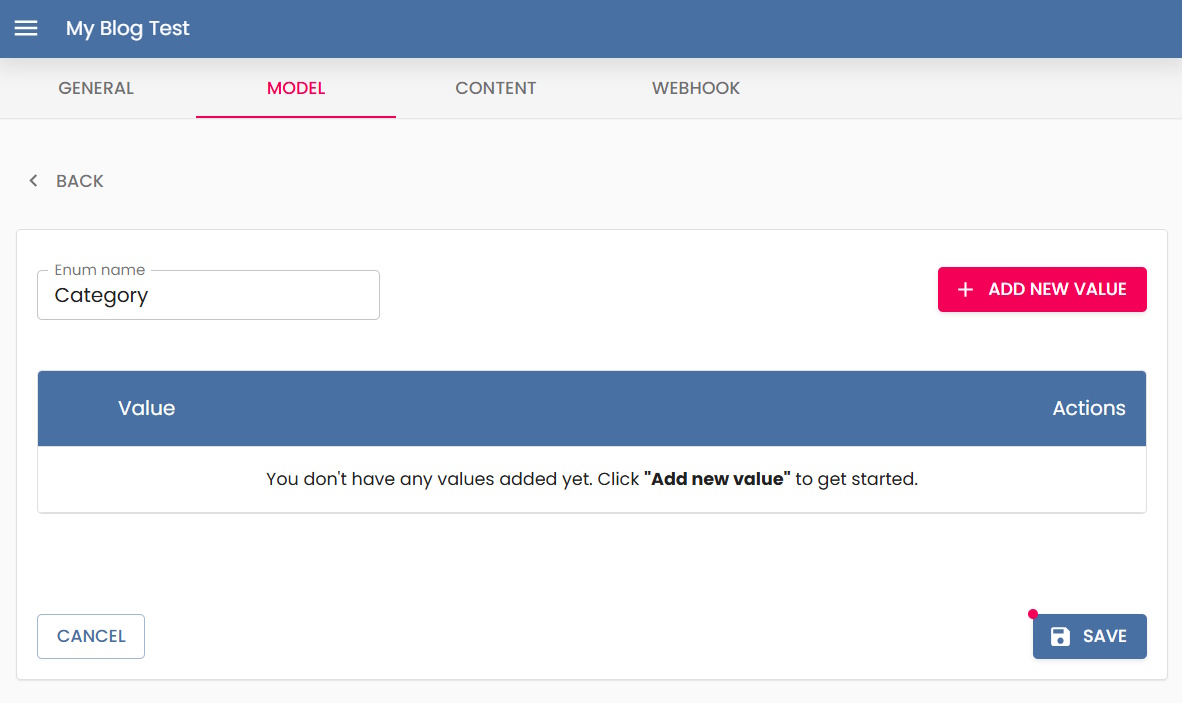
Then, add the values you want the enum to have.
Each time you add a new value, a row is added to the table. You can keep adding values, reorder them (drag & drop), or delete them.
The final result may look like this:
Once created, you can use this enum in other models. For example, you can add a new category field to the previously created Post model:
List
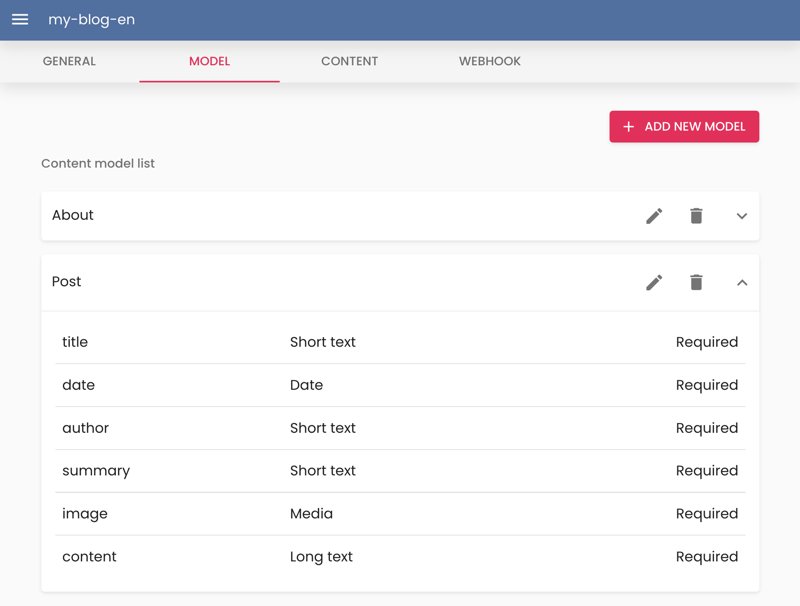
Once several models and enums are created, entering the Model tab will show a list of all defined items.
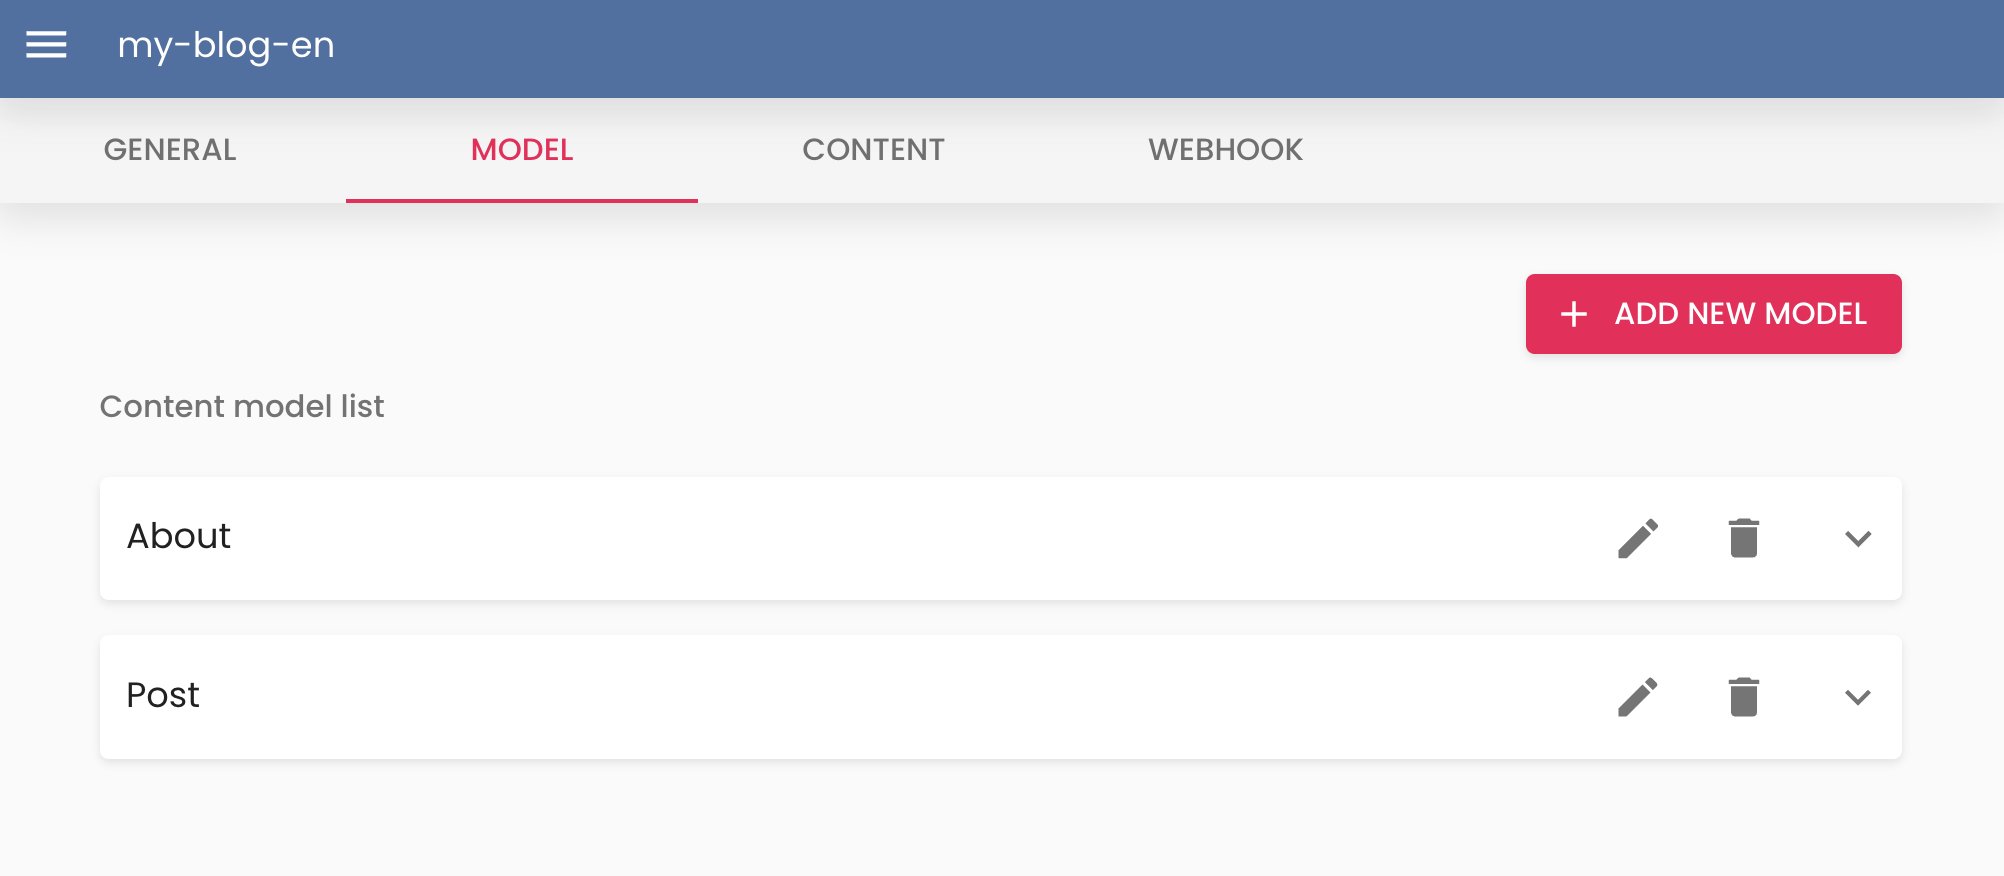
This list is collapsed by default. You can expand each entity to see its fields.
To edit a model, click the pencil icon on the right of the row to enter edit mode.
Generate TypeScript Interface
Each row in the model list exposes a Generate TypeScript Interface button. Clicking it opens a modal that renders a ready-to-paste TypeScript interface describing the model — useful when wiring the model into a frontend or SDK consumer.
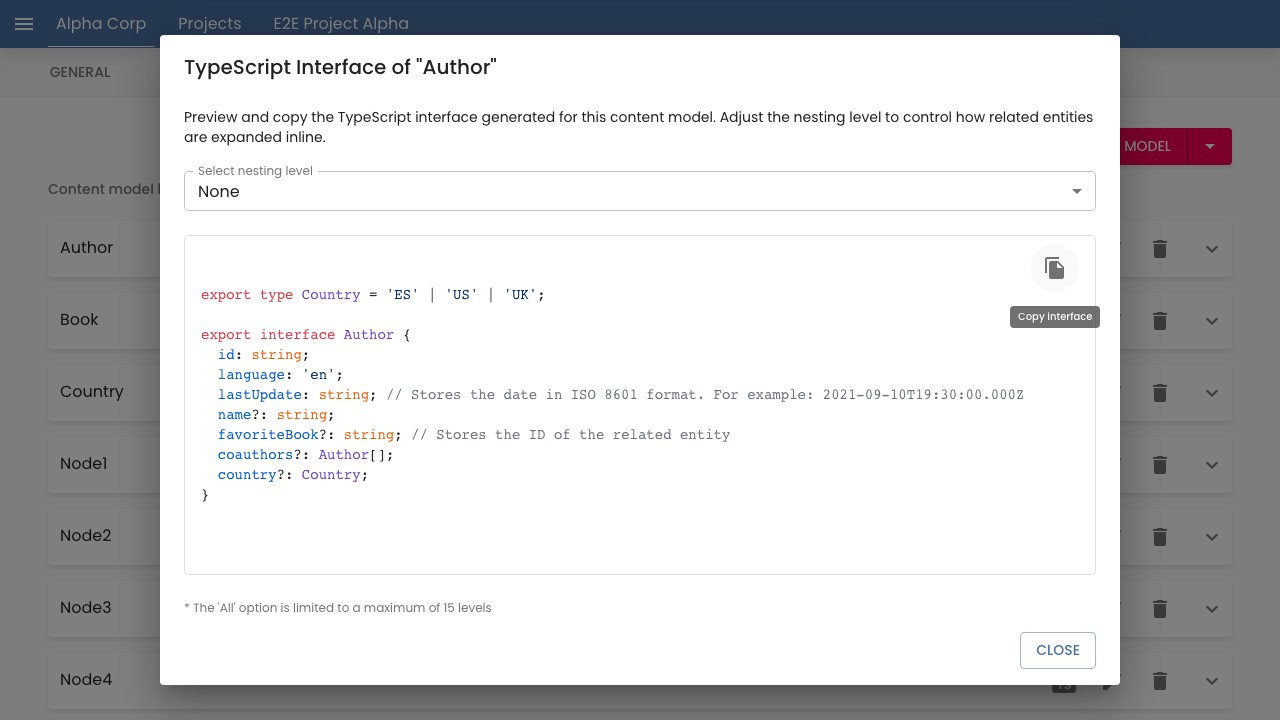
The Select nesting level dropdown controls how related-entity fields are rendered:
| Option | Behaviour |
|---|---|
None (default) | Emits only the root interface. Related-entity fields are typed as string / string[] (the related id) with a // Stores the ID of the related entity comment. |
1 | Emits the root interface plus the interfaces directly referenced by its fields (one level deep). |
All * | Walks the model graph breadth-first up to 15 levels, deduplicating per model so each interface is emitted once even when the graph contains cycles. |
* The 'All' option is limited to a maximum of 15 levels. The cap is symmetric with the depth cap of the B2B REST API — see the Related content expansion section.
The Copy interface button copies the generated code to the clipboard and confirms with an Interface copied to clipboard notification.
Editing
Edit mode is similar to creation mode, but you can update existing fields.
Example
Example of how this works: Go to the model creation video tutorial